Saturday, April 26, 2014

Something Old, Something New


Golden Anniversary
 
Although the phrase “Something Old, Something New” is usually associated with weddings, it also describes my new Anniversary Keepsake that I recently put together after celebrating our milestone wedding anniversary this past January.    I have created keepsake bells for others but not as elaborate as this one!    I used various old and new items to assemble it.    I’m very pleased with the way this turned out


The finished display is about 12” high. 

I’ve had the brass stand for a few years, and knew it would be perfect for attaching the various items, using wire or ribbon.

The ‘new items’ are

-  Numerals ’50’, which were included in a beautiful plant we 
   received from our brother- and sister-in-law

- Two Metallic gold bells (2.5" high) that I purchased at a
   card store.   The 'flares' of the bells almost look like
   tatted rings!
  
- ‘Bow’ Pin (1.5" high) (explained in third photo below) 


The old’ item is, of course, the tatted bell, which I made in 1992, during the early years of my tatting (1990-94) when I was ‘on a roll’ with creating 3-D items,    

It was initially a ‘Christmas’ bell to hang on the tree, but it wasn’t long before I adopted it as my Anniversary bell, since the colors of my wedding were red and white.    It’s made with size 20 Cebelia

There is a gold filet ‘clapper’ inside the bell(not visible in this photo)


This is a close-up of my new sparkly bow pin (not attached to the
bell but only to the brass stand), which I wore to our anniversary dinner.   I can remove the pin from the stand  if I wish to wear it again.

I even sewed small gold bells onto the pin, which are from  “La Mode’ (buttons).  I thought they made a nice addition to it.
 

The gold filigree ‘clapper’ hangs on a chain inside the tatted bell and can be seen peeking through on this photograph


Celebration(s)
Below is the very elegant  restaurant we were taken to as a wonderful surprise by our brother- and sister-in-law  on our Special Day.   This restaurant  has quite a history, and it’s just as elegant inside!   As we had never been there before, it was a really special evening! 
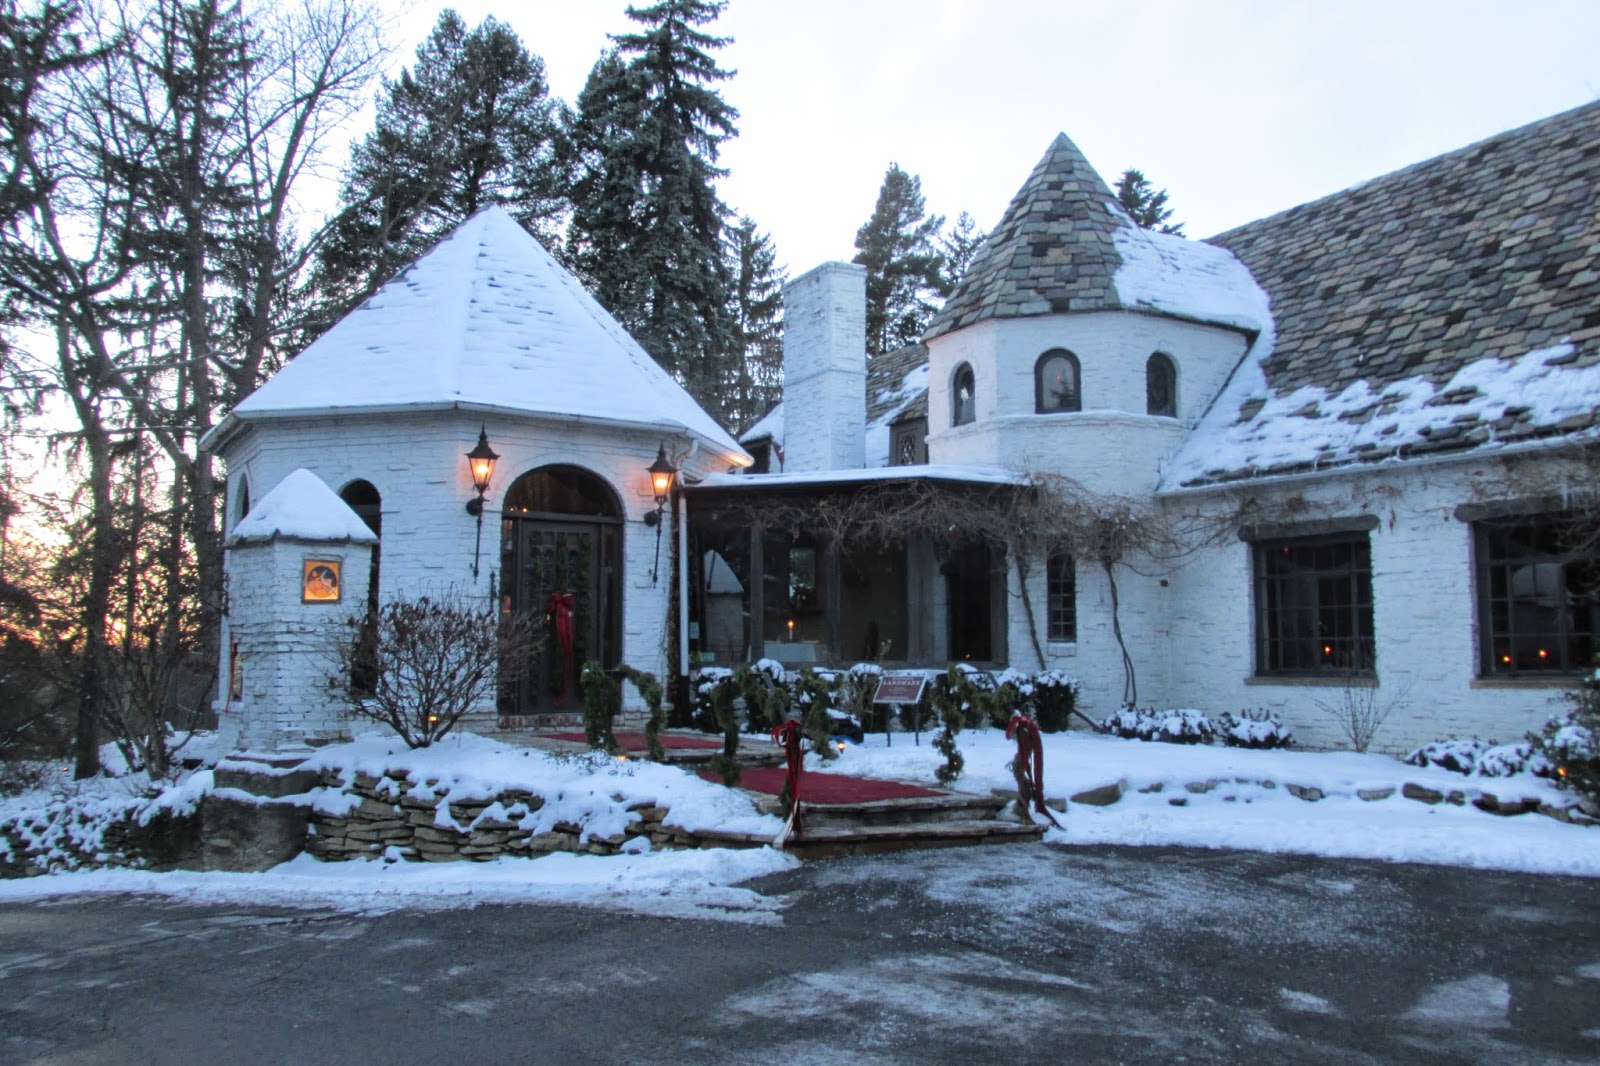

And the weather also cooperated!   In fact, it was similar to the weather on our wedding day in 1964 - a little overcast, and temps in the mid-40s, with some snow leftover from a few days before.  Our anniversaries have ranged from a balmy 60 F. down to 10 F.  On our 30th in 1994, we had to dig out 10” of snow so that DH could get to work !  As I was shoveling snow that day, I was just grateful that we didn’t have that kind of snowstorm on our wedding day!  

This past November we had a low-key, informal celebration of our anniversary (exactly what we wanted) during the Thanksgiving weekend (hosted by the same brother- and sister-in-law), which was a planned get-together with family and several cousins whom we hadn’t seen for several years.   Our other sister-in-law (the one for whom I made the 25th anniversary ‘Mary Konior’ bell) surprised us with a beautiful 50th Anniversary sheet cake for dessert. 

I’m very grateful that we have achieved this magic number, but I’m somewhat stunned at the ‘reality’ of it.  As everyone discovers as they get older, Time somehow speeds up!    It was only  ‘yesterday’ that we celebrated our 25th in 1989 - the year I learned to tat and quilt, and made the Victorian fan tree skirt, with my first tatted pieces on it (hens and chicks, of course, plus a straight line of rings!.  I was very proud of those!      (That year, we were also movie extras (ballroom dancers) in a made-for-TV movie, which is a whole other story!)  

Then we buzzed past the 30th, 35th, 40th and 45th anniversaries, during which years I demonstrated tatting at many events (at least four a year).  (I started this blog between the 44th and 45th !)   And all of a sudden, our 50th was ‘around the corner’!     Lots of memories, mingled with all kinds of emotions!

The other reality is that it's been 40 years since we built our house, and somehow it has become all filled up with 'stuff', which we're now trying to deal with.  More memories and emotions!

 *  *  *  *  *
                                                
Computer Update
I guess I could consider my recently purchased laptop as an Anniversary Gift, of sorts!   It’s very powerful and has a big 15.6” screen.  And – it’s RED – my favorite color, which is the main reason I chose it among the gazillion  models at the store!   Plus the price was right!   I’m now learning about Windows 8 and finally have the full Office again, including Publisher.  I’m hoping I can start blogging more often now! 
This is my first post using it!


Wednesday, March 19, 2014

A Little Late . . .

Belated St. Patrick's Day Greetings!
  
 Here is a shamrock magnet (2" in diameter, smaller than a paperweight, but could be used as one), which I put together awhile ago, using a glass disc that I think is supposed to be used in a large vase, along with several discs that came in a pouch.  It was the perfect size to fit in a clear lid I had on hand, and I decorated it around the edge with metallic gold tape, plus scrapbook embellishments inside. I then stuck a magnet on the back.   It looks nice on the fridge and I enjoy looking at it every day! 


The pattern, of course, is Sharren's famous SCMR Shamrock, which is a nice size. 


And here is a grouping of some 'green' items, just for fun.  I haven't shown my 'other' Aran sweater before .  It's made with dark green yarn, and I knit it  way back in the '90s. I've always enjoyed doing cable patterns.   (Can't believe this sweater is  20+  years old already!)    

Also in the photo is my 'shamrock' plant (actually Oxalis, not native to Ireland, but should be, as it's so perfectly Irish-looking), which continues to survive in its planter and comes inside in winter,  I love seeing the white flowers year round.
'Paddy Bear' is sporting his green bowler hat and green tie and is showing off the shamrock magnet. 

The Celtic pendant is several years old now, and, of course, was designed by Rosemarie Peel.  The big pin shows my name in English and Gaelic Irish ("Catroine").   As I've often mentioned, I always salute my Irish ancestors  on St. Patrick's Day, and I was named for my maternal Grandmothe, Katherine Flanagan. 

Computer Problems
This is a miracle post for me, because for the past several months I haven't been able to get into my Dashboard using my 15" laptop.  (It's seven years old, has Vista (!) and IE9.   I know it's a 'dinosaur' but it's been a loyal friend and it's still plugging along! 

Therefore, I used my trusty little netbook for my prior post, and never investigated why the Dashboard wouldn't appear in the laptop.  But my sweet little netbook crashed last week, and it came as quite a shock (only 2 years old).  So when I went to use the laptop to post on Monday, I forgot I couldn't get into the Dashboard!.  I had to search all over the forums to find out if there was an answer.   

I was surprised (after spending a lot of time) that it apparently has something to do with the browser IE9,  which is not being supported anymore, not even by Microsoft!  (Apparrently IE11 is causing problems in blogger, too.)   However, a simple solution suggested by several helpful folks was to uncheck the 'Compatibility View' in IE9.  Of course, it took me awhile to learn how to do that (I'm not tuned into all these tricks of the trade), and I finally figured it out.  I was amazed and delighted when my Dashboard came back to life!  So it looks like I can do posts again (not that I post that often - something I hope to remedy in the future).    But I now have to look for another computer to replace my netbook, and I will be looking for one with strong graphics capabilities!   And I have to continue hold my breath using this laptop, purchased in 2006! 

Looking forward to Spring!  And the Maple Syrup Festival is coming up soon!

trying

Thursday, January 9, 2014

Tribute to Mary Konior

“Maids of  Honour” Bell, inspired by Mary Konior

This bell is my personal tribute to Mary and is displayed here, along with Mary’s  classic and very popular ‘Queen of Hearts’ motif, which I finally got around to tatting recently, using Lizbeth Vintage Harvest, size 20.  ( I had  some problems figuring out where to connect the picots on the heart pattern and had to really concentrate on where I was going, but I love the pattern.)

 The bell, however, is 15 years old!


It is a special bell that I gave as a 25th wedding anniversary gift to
my brother-in-law and his wife back in 1998.  (They celebrated their 40th anniversary several months ago!)


I recently asked my sister-in-law if she would mind sending the bell to me (they live 300 miles away), as I never photographed it properly, and I want to put together a photo gallery of all my different bells.  Fortunately,   it arrived safely in the mail last Saturday.  ( But I plan to return it to her in person!)
I was delighted to see it again, and it’s  in great condition! It’s good to know that the stiffener I use (Aleene’s Fabric Stiffener)  does not yellow over the years.   I had also sprinkled some fine silver glitter on it before the stiffener dried, and it still sparkles in the light!
 
I recall I used size 30 Cebelia thread.  I knew my SIL would take good care of it.  She appreciates all the things I’ve made for her, and she does excellent needlework herself.  She always displays the bell on her Christmas tree!  
 
I  know I could have tatted a bell for myself ( I still have my ‘chicken scratch’ notes), but for inexplicable reasons, I never did.    
History of Bell and Some Surprises!
When I bought Mary’s Visual Patterns book in 1994,  I fell in love with her ‘Maids of Honor’ edging, and I tatted up some samples.  But I  very much wanted to make a bell using her pattern.   Between 1991 and 1998 I created at least eight different bells using edging patterns that appealed to me, and I knew that Mary’s  ‘Maids of Honour’ design would make a beautiful  bell.   I believe I was successful on my  first try (I seemed to be lucky that way, with all my bell designs!)  and I even incorporated her  ‘Beauty Spots’ pattern into it.  However, I had some surprises in store when I studied the bell again. 
 
It seems I made things much more difficult for myself, as I tatted the 'Beauty Spots' pattern without the Josephine rings (beauty spots)!.  That's kind of important because the Josephine knots go inside the two bottom rings and cleverly hide a single bare thread which leads to the next motif and eliminates the need to cut and tie, as I did.  (The Beauty Spots pattern is on page 31 of the Visual Patterns book.)
 And I was also amazed that I individually tatted each simple  clover leaf motif above the ‘beauty spots’ motifs!   I didn’t know how to do split rings yet!
It was fortunate, however, that the six  repeats of the Maids of Honor pattern worked out perfectly to form the bottom of the bell, over the Styrofoam bell form.  


 I always put clappers in my bells,  usually a large acrylic bead .  I sometimes put a filigree  cap on the bead, but I didn’t do that here.  I probably couldn’t find a silver one ( in keeping with the Silver Anniversary theme).     I attached the bead to a silver chain (cut to the proper length with a wire cutter.  You could also use a ‘real’ jingle bell,   which  would ring!  


A glue gun always comes in handy for attaching flowers and other elements.  These days I would use a wired ribbon, so that it could be ‘curled’. 
I also gave the recipients of my bells a large, clear plastic cup with a lid,  to store the bell safely.
Mary Konior’s Legacy
It’s difficult to believe it’s been four years since Mary’s passing in January 2010.  However, it’s wonderful that tributes to Mary continue to be seen .  She was an exceptional lady, and I’m so glad for the technology of  today with the internet and blogging to remind us of her many achievements and the tremendous impact she had and will forever have on the art of tatting.  Her books were a spectacular achievement and are a fabulous legacy of her talent.  We are the lucky beneficiaries of her total dedication to tatting!   I particularly appreciated her decision to put diagrams in two colors in her Visual Patterns book.   Putting color into diagrams very much improves an understanding of tatting patterns - at least it does for me!     


Thursday, July 4, 2013

Fourth of July, 2013


 New Scarf for the 4th  – with Tatted Pendant!

This is a pendant I recently made, just rings and chains with Lizbeth 20 Christmas Red, and a very nice ‘star’ scrapbook embellishment.  Perfect for the 4th of July!  But what I really want to share is the scarf/pendant idea.

 Metal Scarf Slider with loop for attaching a pendant.


I have seen ‘sliders’ for scarves before,  but I had never seen one with a loop for attaching a pendant.  This makes it very convenient to add and change pendants whenever you like on a particular scarf.

 Here is a close-up of the slider  and my own bail (found at craft stores) - a little difficult to see - which clips on to the slider and to the tatted pendant (the velvet disc is attached to a metal pendant which has a convenient hole at the top).


Here is my red scarf and pendant!   The scarf jewelry came as a set of  two rings and a slider.  
(I found these at Michaels).


And here is the back of the scarf, showing my own method of concealing the ends  to make a ‘necklace’.   I simply used some key rings I had around the house!  (On the displays they just show the ends being tied in back or brought around to the front, which is okay, but I wanted a ‘necklace’.)   

The long scarf is folded in half first, with a key ring placed at the fold.  The scarf jewelry is then put on, but the ends of the scarf on the other side need to be folded over and concealed, after going through the second key ring (this key ring has the lobster hook attached) .   (I’ve been thinking about other options, but for now, this works very well and certainly stays in place! )  I used a clear rubber band to tuck in the ‘ends’ of the scarf,  and another rubber band on the ‘folded’ end of the scarf to mimic the tuck-in of the ends,  to make them look the same – not that anyone sees the back of the scarf under my hair.

Here is another pendant you’ve seen before, and this is another ‘set’ of jewelry. 

The idea is to be able to use just one set of jewelry (and the closure hardware) and put them on another scarf.   But I bought two sets so I could have at least two scarves ‘ready to go’.


Here is the blue scarf.


 UPDATE:  You're not seeing double.  I was not happy with the last two photos (blue pendant and scarf) and I wanted to correct that.  But I'm hesitant to remove the 'originals' because I'm concerned that something weird will happen.  So for my own benefit I'm putting the same two photos in, and one has been cropped.  I have been experimenting with a new camera and with moving photos around in my tablets and was trying to post in a different way than usual.  So here are (I hope) better photos.


Now I'm happier.

 
 Hometown Celebration

I’m hoping to wear my red scarf today when I visit my little ‘hometown’ park as they celebrate their annual festivities and fireworks (at the high school).   
 
That park and playground were the center of my universe back in the 1950s, (it was ‘new’ then, dating to 1947, thanks to the efforts of citizens of the town, including my mother, who insisted a playground needed to be built) and I’m so glad it’s still there.   Wonderful memories!  In May this year they had a small circus (complete with camel  I couldn't believe my eyes when I saw him - just quietly standing there in MY park)!   And last week, one of those ‘hometown’ carnivals came to set up their cute rides for the kids.   These were fundraisers for the fireworks.  There is now a waterpod in the park, and my great-nephews played in it last year! 

 In ‘my day’, the biggest event was the Golden Jubilee in 1954, a week-long celebration with ‘home-made’ arcade booths (such as throwing ping pong balls into glass bowls, and penny throws onto a marked board, to win prizes).    I thought it was a most magical time in the park, when I was ten!    I took for granted all the work that the adults did to provide this ‘magical’ setting and celebration. 

The movie ‘Picnic’  always reminds me of that time in the ‘50s, although their town was much larger than mine!  We did have a lovely Jubilee Queen, though (my friend’s 17-year-old sister), but no drama surrounding her, as in the movie!   Just a lovely gal!  She worked as a switchboard operator at the telephone company.  Remember those operators?   We simply picked up the big black phone (attached to the wall, of course) and told the operator the phone number – four digits preceded by a town name – like “Smithville 5059”.  My father’s office number in Pittsburgh was a little larger:  Atlantic 1-9000.   Still remember it!  I’d bravely call his office to tell him something ‘really important’!  Had to get past the operator there, and his secretary (who was my role model)!   Later on, I became a secretary and passed along calls from my own boss's children!

 Some History Facts for this date, for those interested

In addition to Independence Day (the 237th), this week in July also includes other major historic events, especially this year’s 150th anniversary of the Civil War Battle of Gettysburg in 1863, and a lesser known anniversary of George Washington’s disaster at ‘Fort Necessity’ on July 3, 1754 at Ligonier, PA, (as he at age 22 led his fellow British troops into an unfortunate 'skirmish', which kicked off the French/Indian War against the British (the Seven Years War).  Big repercussions over that 'skirmish'!   Twenty-one years later he would begin his command of the  American troops (starting 1775) during the Revolutionary War against the British!   Amazing stuff).  
 
My home state of Pennsylvania is the site of these events.  Also, many other  important events occurred over the years in the strategic area around Pittsburgh, where two major rivers (Allegheny and Monongahela) meet to form the Ohio!   

In fact, Washington (at 21 in 1753) rode right through the ‘wilderness’ woods which eventually (1904)  became my little hometown!    He was following the Ohio River to Logstown  (farther downriver) , to find an Indian guide to take him up to a French fort near Erie (a mere 100 miles away!).  On the way back, he almost drowned crossing the freezing Allegheny River!    

This is also an update:   I  want to add that there is a  little known Pittsburgh connection to the Lewis and Clark saga, also in July.    On July 15, 1803, Meriwether Lewis arrived in Pittsburgh (by horseback, from Washington DC) to pick up the large keelboat  he had contracted to have built for the famous trip up the Missouri River.     But the keelboat was not ready as promised, and he had to stay a month and a half in Pittsburgh, waiting for the boat to be completed.  It was finally ready by Sept. 1.  While in Pittsburgh Lewis wrote important letters to Thomas Jefferson and also received the confirmation letter from William Clark, who agreed  to go on the mission.  Clark was living in Kentucky on his family's plantation, and Lewis (and some other boatmen) joined up with Clark in October in Kentucky, then they continued on to St. Louis, where they had to recruit more men and obtain supplies before starting the official exploration to tne Northwest in May of 1804.                     
   

 I hope you have a pleasant Holiday and weekend!

Monday, April 1, 2013

Interlocking Rings made with Shuttle - Part 2 of 2


HAPPY INTERNATIONAL TATTING DAY  2013!

 It dawned on me yesterday (Easter Sunday) that Monday, April 1, would be  INTERNATIONAL TATTING DAY.    So I pushed a little harder to get this TUTORIAL done today!

 
Part 2 - TATTING THE FINAL RING.

 As you can see in Photo 12, I have completed five rings and am preparing to tat the last ring.
 
PHIOTO 12   
First, you have to UNWIND THE SHUTTLE. so that you can put the end of the thread through the first ring (the yellow one here), coming UP through the ring.    This sets up the foundation for the last ring to go ‘over’ the yellow ring. 
Please ignore the  thread going out of  the  picture  on  the  left.   It is still attached to the ball and it’s  just  sitting  there, waiting to be cut off  later)
 Keep pulling the unwound thread up through Ring #1  all the way through.  (Obviously, it’s coming from the base of Ring #5.)    I like to pull the thread through all the way through before I start rewinding my bobbin.   
 
PHOTO 13    
My rewound bobbin is back in the shuttle  
 You’re not worrying about the hand-wrap yet. Just concentrate on rewinding the shuttle
For the photo, I’m showing the shuttle wound very close to the rings. But after rewinding the shuttle,  you will then pull some thread out to give it some slack.


PHOTO 14   
 
You then  reach in with the hook on your shuttle (or a pick or crochet hook) to pull that thread out from behind the base of the fifth ring and bring it over top of the fifth ring, as shown here. 


PHOTO 15     
You again capture that loop as if doing a ‘down’ join, the same way you did before.    You will then make the loop larger to put onto your left hand, as you did before.  .


PHOTO 16     
Remember that the part of the thread going under the bottom finger is attached to the shuttle, so that when you tug on the shuttle, that thread moves with the shuttle.   

You are ready to tat the final ring!


PHOTO 17   
When you start the final ring, the ‘fussiest’ part is to get the first knot as close to the base of Rings 1 and 5 as possible,. This will come with practice. I like to use a looser tension for that first knot.
 
Shown here are several stitches on the last ring.


PHOTO 18     
Ring 6 ready to be closed!


PHOTO 19    
Ring 6 almost closed. . You can see the last bit  of the foundation thread is showing through. 
The hook of the shuttle is merely pointing to the last stitch as it is closing. It is not hooked over
the thread in any way! Of course, I would be pulling the ring closed to the left.    I’m just showing the positions of the ball and the shuttle thread here.


PHOTO 20  
 
Ring 6 finally closed.   

You can still  tug it a bit (but not too tight) and pop the ring up over the top.
 
I know that the first ‘orange’ stitches seem a little twisted, and that may be something that can be solved in the future. I’m just happy this works as well as it does!


Sure hope these instructions are clear!    Good luck!!
 
*  *  * 
 Our group is getting ready for the Maple Syrup Festival this weekend, and it looks like we’ll have some decent weather for it, which always helps with getting ready.   Thousands of visitors attend this event!