Friday, December 24, 2010

And All Through the House

the Tree was in place, and so was the lace ....

VICTORIAN DOLL HOUSE - purchased in 2000

I thought Christmas Eve would be a good time to show photos of the exterior and interior of the doll house that I take to all my tatting events so you can see how I've decorated it in 'Victorian' style, with Victorian furniture and, of course, tatted lace. I will be describing this lucky find more fully in a future post, and also how and where I found the furniture.


This is the front view.

The door actually opens, and normally you can see into the house through the clear (acetate) windows, but I wanted you to see the detail on the windows.


Here is the side with the double window, which I find charming


.


Here is the side with the single window


And here is the interior, which is the way it looked a few years ago (a photo of a photo).

I've made a few changes since then, but you get the general idea.


The tree is all beads, which I found at Michaels.

Note the hardwood floors on the 1st level!


In a future post, I'll take you on a more detailed 'tour'.

At the moment the interior is not 'photo ready' because the house just came back from two events, and the furniture is still in disarry, as I always put it in positions that make it safe to carry, and I haven't had a chance to get it all back in place!

* * *


On this Christmas Eve 2010, I wish those of you who celebrate
the Christmas holidays
a Very Merry Christmas!


* * *

As a record of the weather here in Pittsburgh on Dec. 24, 2010, there's about 3" of snow on the ground (from previous snowfalls) - but none on the roads - with temps in the low 30s, no precipitation, no wind. Perfect. This kind of weather doesn't often happen on Christmas Eve, but this is how I remember every Christmas Eve during my childhood in the 1950s! It was a magical time - waiting for Santa! I'm feeling quite nostalgic this evening!

Friday, December 17, 2010

Christmas Tree Pin - 1991

- Multiple Uses for Edging Patterns
- Black Wool Cape (from my costume wardrobe)

I recently wore my Christmast tree pin (circa 1991) during our recent Festival events, and I was reminded how it came about. And when I wore it on my black wool cape, I also added another piece of tatting to it to make it more noticeable (see below).

Here is the pin I made in 1991


It is from the same edging in Ann Orr's Classic Tatting patterns that I used to form the star shown in my Feb. 17, 2009 post. I noticed that each point of the edging looked like a Christmas tree. So I tatted one motif in white thread, then glued it onto a card, and it did look like a tree.

But I thought the motif looked the right size to put on a pin backing that I had purchased from a craft store. The pin backing (about 2" high) is made for inserting a separately purchased cameo. However, I cut a velevet oval from gift ribbon to fit into the center of the pin, then glued the tatted tree (in gold metallic thread from DMC) onto the velevt.


Then I glued tiny rhinestones to add bling. I made several of these pins for friends and family

Wearing pin on Black Wool Cape

When I went to our recent tatting events on Dec. 4 and 11, I wanted to wear the pin on my black wool cape that I purchased a few years ago at a consignment shop (a very lucky find!). But the pin by itself didn't stand out, so I found a piece of tatting in my stash to 'frame' it. It is an ecru tatted edging which I had formed into an oval. I pinned the edging to the cape (didn't have time to baste it down), then centered the Christmas pin inside it. I received lots of compliments on it!


Here is a close-up of the pin on the cape
framed by the ecru edging.


Here is a photo of the entire cape. There is red piping around the neck and down the opening, which is a part of the red interfacing inside. I pinned back the interfacing so you can see how nicely the cape is made.


I have no idea where the cape came from, but it's a welcome addition to my costume wardrobe!

Monday, December 13, 2010

Snowflake Inside a Clear Ball Ornament


Sharon's Merry Christmas snowflake!


Because I'm having blogging/computer problems (long story), I'm going to publish a REALLY short post (aren't you glad?) to show you that I was able to get Sharon's pretty snowflake into a clear Christmas ball ornament.


Sharon generously gave us this excellent pattern last year in her December blog. I loved the pattern and her easy diagram, and I posted about it in my own blog on Dec. 24. (In fact, this IS the snowflake that I made last year.)


The ornament is plastic - not glass, as they usually are - and is very well made. I got it at Michaels, and it is 3-1/2 inches in diameter. They also have smaller ones. I like this one because it has a larger opening, which made it easier to 'roll up' (not fold) the snowflake and drop it down into the ornament.


The hanger on the snowflake is wrapped around the 'knob' on top of the ball, and the metal top is clamped over top of the hanger, holding it in place.


I made the snowflake with Lizbeth white, size 20, and it didn't need any sitffening. It easily rolled into a 'tube' (not too tight), then it unfolded when it got into the ornament after jostling it a little bt.


It is displayed here on an 'egg holder', so that it can sit on a table.


* * *


During the past two weekends, our group demonstrated tattig at Vicary Mansion (Dec. 4) and Old Economy Village (Dec. 11). Considering we've consistently had 'snowy-blowy' weather for the past few weeks, we were lucky to have had good weather both Saturdays. Today we're back to snow!


Tuesday, November 23, 2010

Tatted Angel in Snowglobe !

Product Alert:
This unique snowglobe has a place for inserting photos (2" x 3"), but also has plenty of room to insert a small piece of tatting, and it can be seen from both sides. It is also magnified.


I want to alert you to these snow globes that I found in the Photo area of the big discount store whose intials are W-M. These globes are also advertised on the internet.

The large snow globes (which are not glass but some kind of soft acrylic material) allow you to insert two small 2" x 3" photos back to back. The photos get magnified and look as if they're floating in the snow globe, with the usual 'snow' swirling when you shake them. Cost: about $10.

The base stand just pulls off, and the photos are placed inside the plastic insert (shown in the photo below), which then slides up into a protected area of the globe. Very clever!
I knew exactly the tatted piece I wanted to showcase.
I'm sure you've already guessed what it is:

Motif #20 - Second Round
Hairpin Lace and Tatted Angel - by Martha Ess

Of course, it's Martha Ess's excellent and innovative angel pattern, which can be found on the internet.
For some reason I'm not able to paste the link to the URL here. If you Google "Tatted Angel Hairpin Lace" it will be the first listing on the page. I apologize for the inconvenience!
For size comparisons, here is the angel outside the globe, next to the clear plastic insert (2" x 3") which slides into the globe from the bottom, and holds the photos (or in this case tatting) in place.
I tatted the angel with size 30 Cebelia thread.
I first saw Martha's lovely and unusual pattern (combining hairpin lace and tatting) on the internet in 1998. I was very much intrigued by it, and finally decided to try to make it, possibly around 1999.

Somehow I had a hairpin lace loom among my craft supplies, but had never used it other than to practice making a small sample of hairpin lace, using a crochet hook.

I was quite pleased with myself when I finished the piece (minus halo - I hope to add it soon!), and it's the only hairpin lace I've ever made.

As most of you are aware, Martha has gone on to design so many other fabulous designs, has written several tatting books, and has taught classes at Hector and Palmetto. Thank you, Martha, for your total dedication and innovative contributions to the art of tatted lace !
These snowglobes are a great showcase for your smaller tatted items, which can easily be changed according to the season.
I hope to put a printed gold label on the base, and definitely plan to buy a few more globes!
* * *

In the United States we are looking forward to celebrating Thanksgiving on Thursday, a very pleasant holiday to share with friends and family. i hope you also have a wonderful weekend!

Tuesday, November 2, 2010

More Treasures from Wanda!

Part 2 of 2

In addition to winning Wanda’s fabulous Pumpkin Vine Bookmark (see prior post), I was stunned that there were so many other items hidden in the pretty red gift bag that she handed me at the restaurant on Sunday (Halloween), all part of a very generous Giveaway Prize for her 2nd Blogaversary!


Imagine my total surprise at receiving all of THIS, in addition to the Bookmark!

I certainly appreciate the time and effort that Wanda made into gathering, and in some cases, making or decorating, these items!


The attractive candle contains three scents: Maple Sugar, Pumpkin Spice and Caramel Apple Crisp. How yummy is that?!!! I can’t wait to light it up! (I didn’t even know there WERE ‘three-scented’ candles!)

Next to the candle is a lovely tea tin, decoupaged by Wanda with a pretty fabric (in my favorite colors), all around the sides and on the lid! I can now rescue my teabags from their cardboard boxes!

Inside the tin were all the items you see in front of it! I was amazed to pull all these things out of the tin while we were visiting!

- Lizbeth #20 Autumn Spice thread (one that I don’t have!)

- Three cute wood ‘paddles’ with Lizbeth solid thread samples
in Fall colors: brown, green and orange (the last two were used in her pumpkin
bookmark!) She labeled them with a green glitter pen! I notice these things!


- Three matching items (pictured below) all decorated with the
same pretty 'Falling Leaves' fabric:


An unusual ‘fine’ crochet hook with a cylindrical handle, again decoupaged by Wanda. I’ve never seen this kind of hook before! I have one that has a flat handle, but not cylindrical. Very ergonomic!

Clover shuttle, also decoupaged by Wanda, which makes it so special and unique!


Wonderful Needle Keeper, expertly sewn by Wanda!


Inside the needle keeper, complete with needles!!!!


This is so nicely made, and will be VERY handy!


And there were even MORE items! (shown in the first photo above)

A cute postcard from Kansas, which shouts “Hay! from Kansas”, also showing a big sunflower (the State flower)! :)

Pumpkin Seed Recipes”! Very handy for this season!

And another BIG surprise: Karey Solomon’s “Here be Dragons” book, which I have never seen before. It has amazing patterns in it!

I am so overwhelmed by all of this, from getting the notification that I won ‘something’, to making arrangements to meet, and to sharing that wonderful and special time together!

And she still had to continue on with her long road trip to Kansas (over several days), whereas I was only 45 minutes from home!

Wanda is such a delightful person – she is so cheerful and enthusiastic, and seems to have endless energy, not to mention her exceptional creative talent! Her blog, only two years old, is brimming with her own beautiful tatting designs (several of which she has shared with us) plus excellent ‘travelogues’ about her travel adventures!


And her devotion to family, friends and work is obvious. I’m so glad I got to meet her in person - plus her daughter and grandson! Quite an amazing day!!
I can only say: THANK YOU SO MUCH, WANDA!


This has been a very wonderful experience!

Sunday, October 31, 2010

HAPPY HALLOWEEN (Today!)

I'm doing a quick post today because I just HAD to explain how Wanda's Pumpkin Vine Bookmark is now in MY possession on this Halloween Day 2010 !!! :) :) :)


This is Wanda's actual bookmark designed and tatted by Wanda herself! (Wanda of “Wanda’s Knotty Thoughts Blog”), and it is now in my house, where I just took the above photo!
It is Wanda’s prototype, first edition, one-of-a-kind bookmark, based on Heidi Sunday's innovative and clever 'pumpkin vine' pattern found at

Here's where you saw Wanda's bookmark first - On October 26:


Wanda had been fascinated by Heidi's vine pattern and designed a full bookmark from it with lots of twists and turns and lots of ‘pumpkins’!

This bookmark is nothing short of brilliant and I can't believe I now 'own' the actual bookmark that she posted on her blog!
However, GET THIS !!
The bookmark was handed to me IN PERSON
TODAY - by Wanda herself!!
How did this happen, you might ask, considering I live in Pittsburgh, PA and Wanda lives in Kansas !

Well, here's the 'short' story! :)

Wanda recently held a giveaway to celebrate her 2nd blogaversary, and - I WON!

The giveaway was announced in her post dated Oct. 12, where she described making her amazing "Doily with Antique Motif.” (Please check that out, too!)

All you had to do was leave a comment in that post, and you would enter a drawing for a prize. The drawing would be held Oct. 26. Of course, I commented on the doily, which is gorgeous! (And to tell you the truth, I completely forgot about the giveaway!)

On Tuesday, Oct. 26, she notified me that I won the drawing ; and, of course, I was delighted, even though I had no idea what the prize was! She was keeping it a secret!

I sent my address to Wanda so that she could send the prize to me.

When she received my address (I live in the Pittsburgh PA area), she realized that she would be in my 'neck of the woods' on Sunday (today - Halloween Day), as she would be driving from Washington D.C. back 'home' to Kansas, and was taking I-70, which passes very near Pittsburgh! (This gal really gets around, which you already know if you follow her blog!)

She asked if we could possibly get together, and - long story short - that's what we did this afternoon!

We met at a restaurant off I-70 and had a GREAT time and an enjoyable tat-chat while having lunch at the restaurant! What's more, I got to meet one of Wanda's daughters and her adorable 2-year-old son (one of Wanda’s grandsons) who were also on the LONG ride back to Kansas!!!

To my amazement, Wanda's giveaway has several parts to it, which I will post about soon, but when I opened a card with this fabulous bookmark in it, I was totally in shock, as I recognized it right away!!

I asked if she tatted a second one so soon after the first, and she said "No, this is my first and only one". I protested that I couldn't possibly accept it! How could she bear to part with it!??? But she insisted it was now mine!

I am truly honored and delighted to have this bookmark!!! It is amazing to see it in person!

And, as mentioned there were other amazing surprises! It was like Christmas on Halloween!

Stay tuned for Part 2 - and more photos! Just wanted to get this posted ASAP!!!
In our neighborhood, 'Trick or Treat' night was on Thursday, so I was able to do this post without interruption from 'Ghosts and Goblins!' Hope you get to enjoy some leftover candy, especially CHOCOLATE!

Wednesday, October 20, 2010

Fluttering By - finally!


- New (to me) butterfly pattern
- Necklaces for pendants


I’m finally doing a post again, and never intended to be away this long! I’m ‘late’ in finishing my second round of the 25-Motif, so I’m getting back in the game with Motif #19 today to show that I actually am doing some tatting, and I hope to finish posting six more motifs soon, to complete the 25.

Motif #19 – Second Round
from “Butterfly Twins” designed by Eliz Davis
.

We’ve been traveling and having some fun adventures (except for a flat tire on the turnpike - long story there!) and while on the road or at a motel, I like to tat 'easy' things. I happened upon this sweet butterfly pattern on the internet, and I was smitten! I knew it would also be a fun and quick way to ‘test’ the colorways of variegated threads


Clockwise from Upper Right:
Caron Wildflowers ‘Twilight’ ;
Lizbeth #20 Vineyard Harvest;
Lizbeth #20 Spring Garden

Center of Photo:
Caron Wildflowers ‘Harvest’
This three-ring section is the first round of the butterfly pattern, but I made a slight modification (see below).
The original design, “Butterfly Twins” by Eliz Davis (“Tat Knot”) goes back to 1998, is a diagram, and is located in the sidebar in her blog http://www.tatknot.blogspot.com/ where she has generously shared other free patterns. Thanks, Eliz!

As the title implies, the pattern is written for two little butterflies to be joined together, and attention must be paid to the outer chains (the wings) on the diagram for placement of the picots and connections when forming the wings. However, because I made individual butterflies, I used the same stitch count for forming both wings, with no picots.


Also, in order to do each butterfly in one pass, Liz indicates a split ring for the third ring of the 'clover' in the first round, which would be very convenient for avoiding extra threads to hide.

However, I didn’t want to wrap two shuttles to do the split ring, so I did a normal ring instead (5 total picots: two joining and three showing - always being careful not to twist the final joining picot to the first ring). For the most part, hiding threads is not a big problem for me, and I usually encapsulate the beginning thread. Also, I could choose the color for the beginning small ring on the second round. (I didn't do front-side/back-side tatting on these!)

The antennae are quite easy to add (with a crochet hook), but as you can see, I have so far only added antennae to the ‘blue’ butterflies.


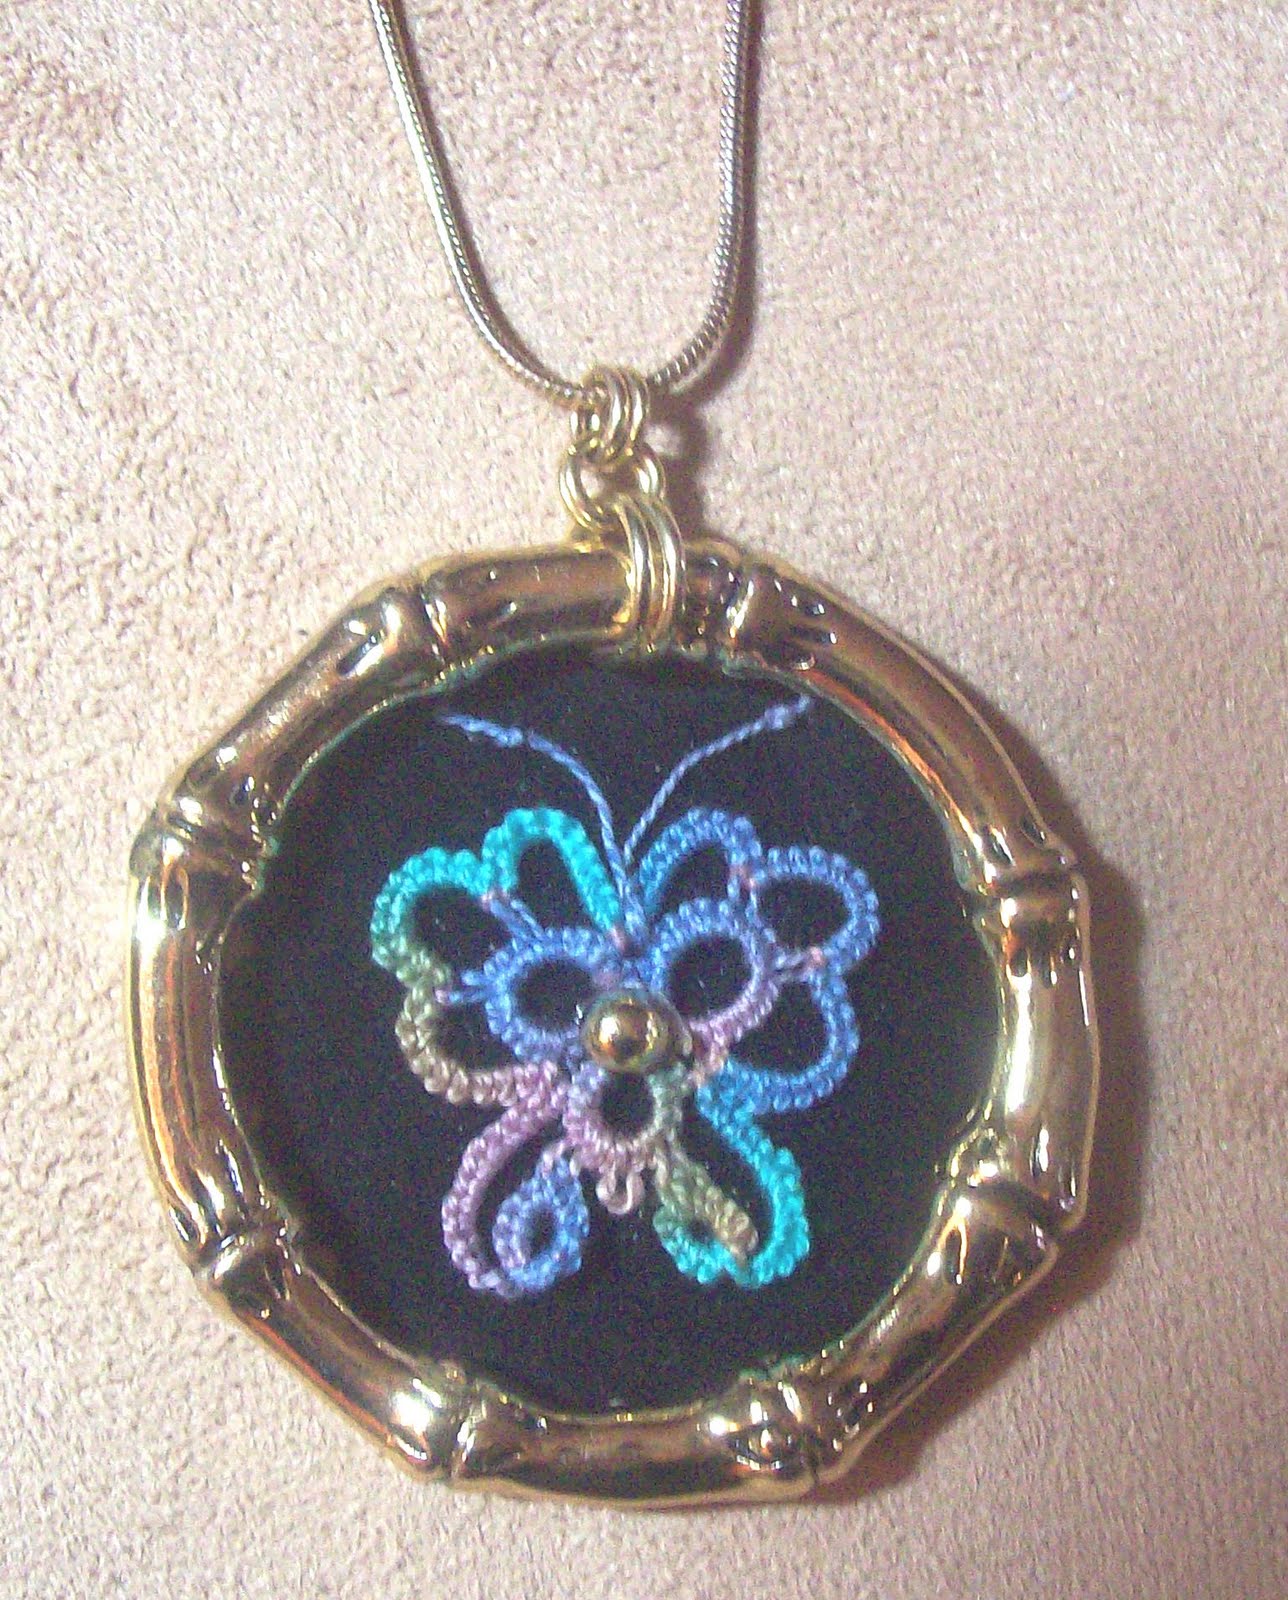
Of course, I had to put one of these butterflies on a pendant!

This is a duplicate of the
‘Twilight’ butterfly shown above, although the colors aren’t quite exact in either photo.

I obtained the Caron Wildflowers threads at my local cross-stitch shop. They are equivalent to size 30, but are a little tricky to tat with – not as smooth as Lizbeth. I have to use less tension.


The little butterfly is also perfect to add to cards, such as the one I made for my mother-in-law for her recent birthday.

These were made with Lizbeth ‘Jellybean’, and were easily attached to the card with gold brads (from my scrap book supplies)


“New” beaded necklaces for my pendants

My recent posts have shown small motifs I’ve put on scalloped black velvet ‘paper’ discs. I recently attached four of them to some colorful beaded ‘necklaces’ that I found at – of all places - the dollar store!
They were eyeglass leashes! I cut off the parts that go over the eyeglass ‘temples’ and joined the ends with a jump ring and bail (which necessitates putting the necklaces on over my head, without a clasp).


I was amazed at the variety and colors of beads on the leashes, which happened to match my pendants!
I did add my own green beads and spacers to the necklace on the far right.

My next posts should be coming up soon! I’m getting much more done around the house with the cooler Fall weather, and always marvel at the changing colors of the leaves – which sometimes happens overnight! It really is a beautiful time of the year, and I'm not missing the hot, humid weather we had this summer!
A blogging note: I edited portions of this post (the next day) to 'improve' some of my sentences (that task could go on forever!), and I also tried very hard to make the spacing the way I want it to be. The written edits indeed were reflected, but I just can't seem to control the spacing. And it may get even worse! I know it has something to do with 'html' codes, but I have no intention of learning them. So, unfortunately, my posts will continue to look a bit 'wonky' and not up to my standards! I'm amazed that blogging can be done at all and I find the technology wonderful - but also frustrating!